"Did the marketing team return the camera they borrowed?", "Who’s got the projector adapter this time?". These problems are common if your company still relies on paper or Excel to track borrowed equipment. Manual entries are tedious, often left outdated, and can’t be automated—making it hard to keep track of everything.
In Ragic, using the Action Barcode and Update Values Action Button, you can set up a QR code system to manage equipment borrows and returns effortlessly. The system tracks the time, status, and person responsible for each checkout while keeping a clear overview of each item's status. Plus, a single QR code handles both borrowing and returning—no need for separate buttons. It's straightforward and efficient!
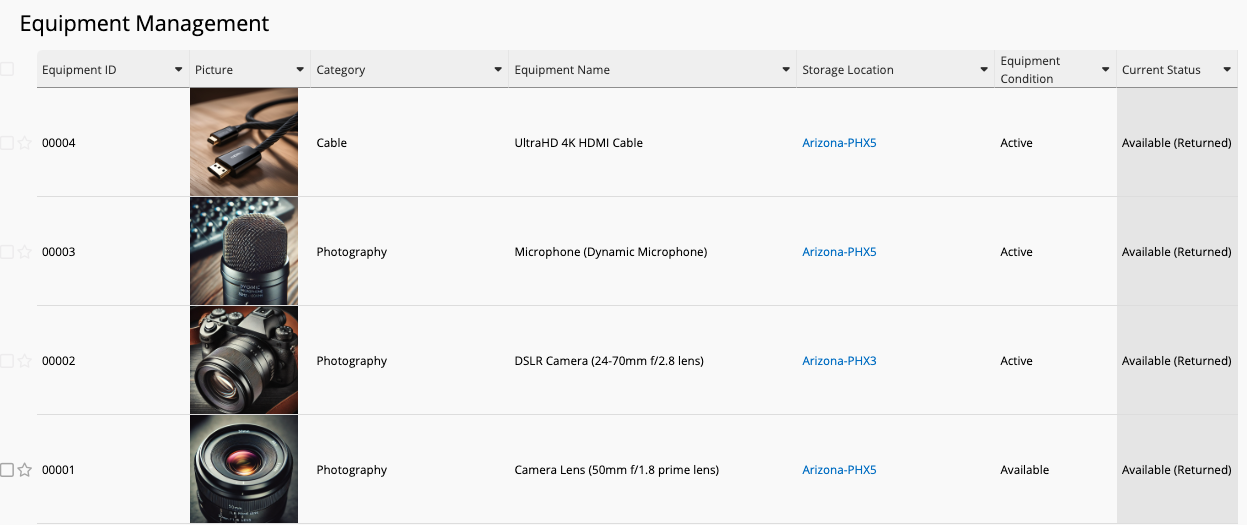
To manage equipment borrowing and returning with QR codes, follow these steps:
1. Create an "Equipment Management" sheet. Include details like ID, Name, Type, Model, and Storage Location. Add additional fields such as QR code, Picture, Current Status, Upcoming Status, Recent Borrow/Return Time, and Last Borrower/Returner. Also, add a "Checkout History" Subtable to track the borrowing and returning time, status, and the person who did it.
To prevent manual changes, it's recommended to set fields like "Current Status", "Last Borrowed/Returned Time", "Last Borrower/Returner", and Subtable fields to Read Only.
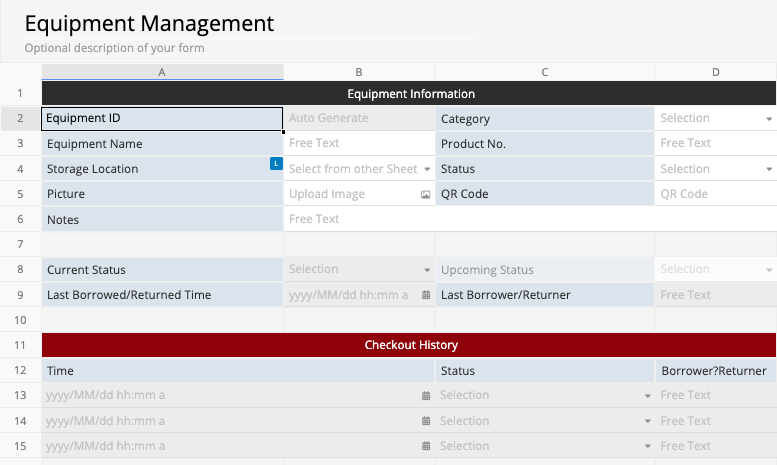
2. To determine whether the next scan is for borrowing or returning, set a conditional formula in the "Upcoming Status" field (D8):
IF(OR(ISBLANK(D12),LAST(D12)=="Available (Returned)"),"Unavailable (Borrowed)","Available (Returned)")
Based on this formula, if the Status (D12) is empty or the last status was "Available (Returned)" the "Upcoming Status" field will update to "Unavailable (Borrowed)". If the last status was "Unavailable (Borrowed)" it will update to "Available (Returned)". Since this field is mainly for calculation, it's recommended to hide this field.

3. In Design Mode, go to Tools > Update Values, to create an Action Button named "Equipment Borrowing/Returning". This button will record the borrowing/returning time, status, and the person responsible. Follow the steps below to set up the button:
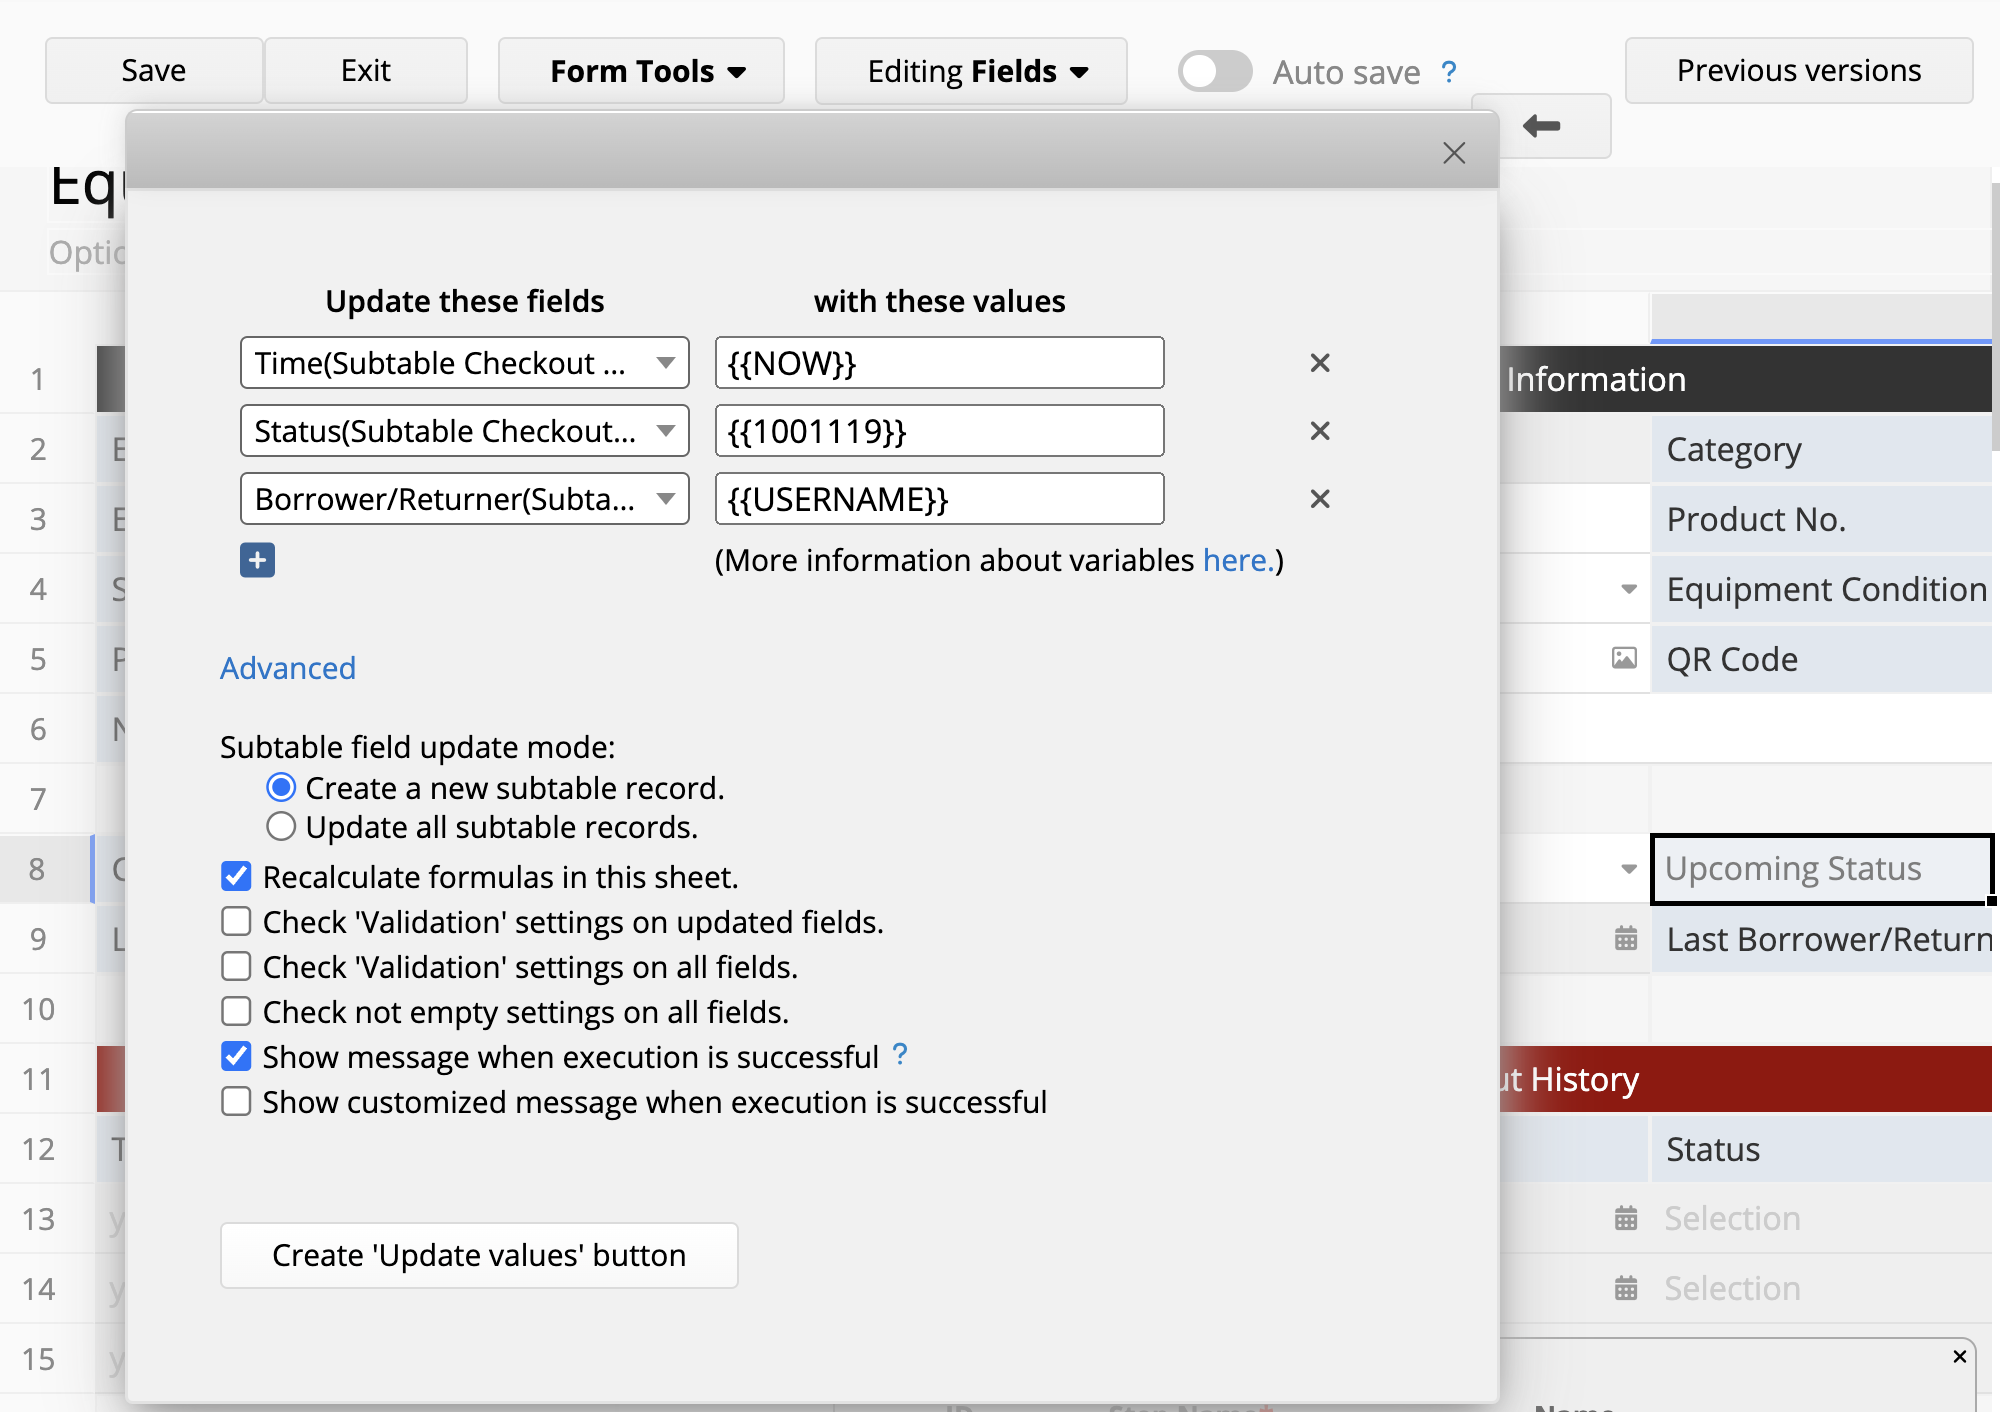
(1) In the Action Button settings, set the Subtable’s "Time" field to {{NOW}} to record the exact time of borrowing or returning.
(2) Set the Subtable "Status" field to update with the "Upcoming Status" Field ID (in the example sheet, it's {{1001119}}).
(3) Set the Subtable "Borrower/Returner" field to {{USERNAME}} to capture the username of the person performing the action.
(This document covers the variables supported in the "Update Values" Action Button)
Additionally, to ensure that formulas in this sheet are recalculated each time the Action Button is triggered, check the box for "Recalculate formulas in this sheet". Once set, the Action Button will automatically add a new entry for borrowing/returning time and status in the Subtable each time it’s executed.
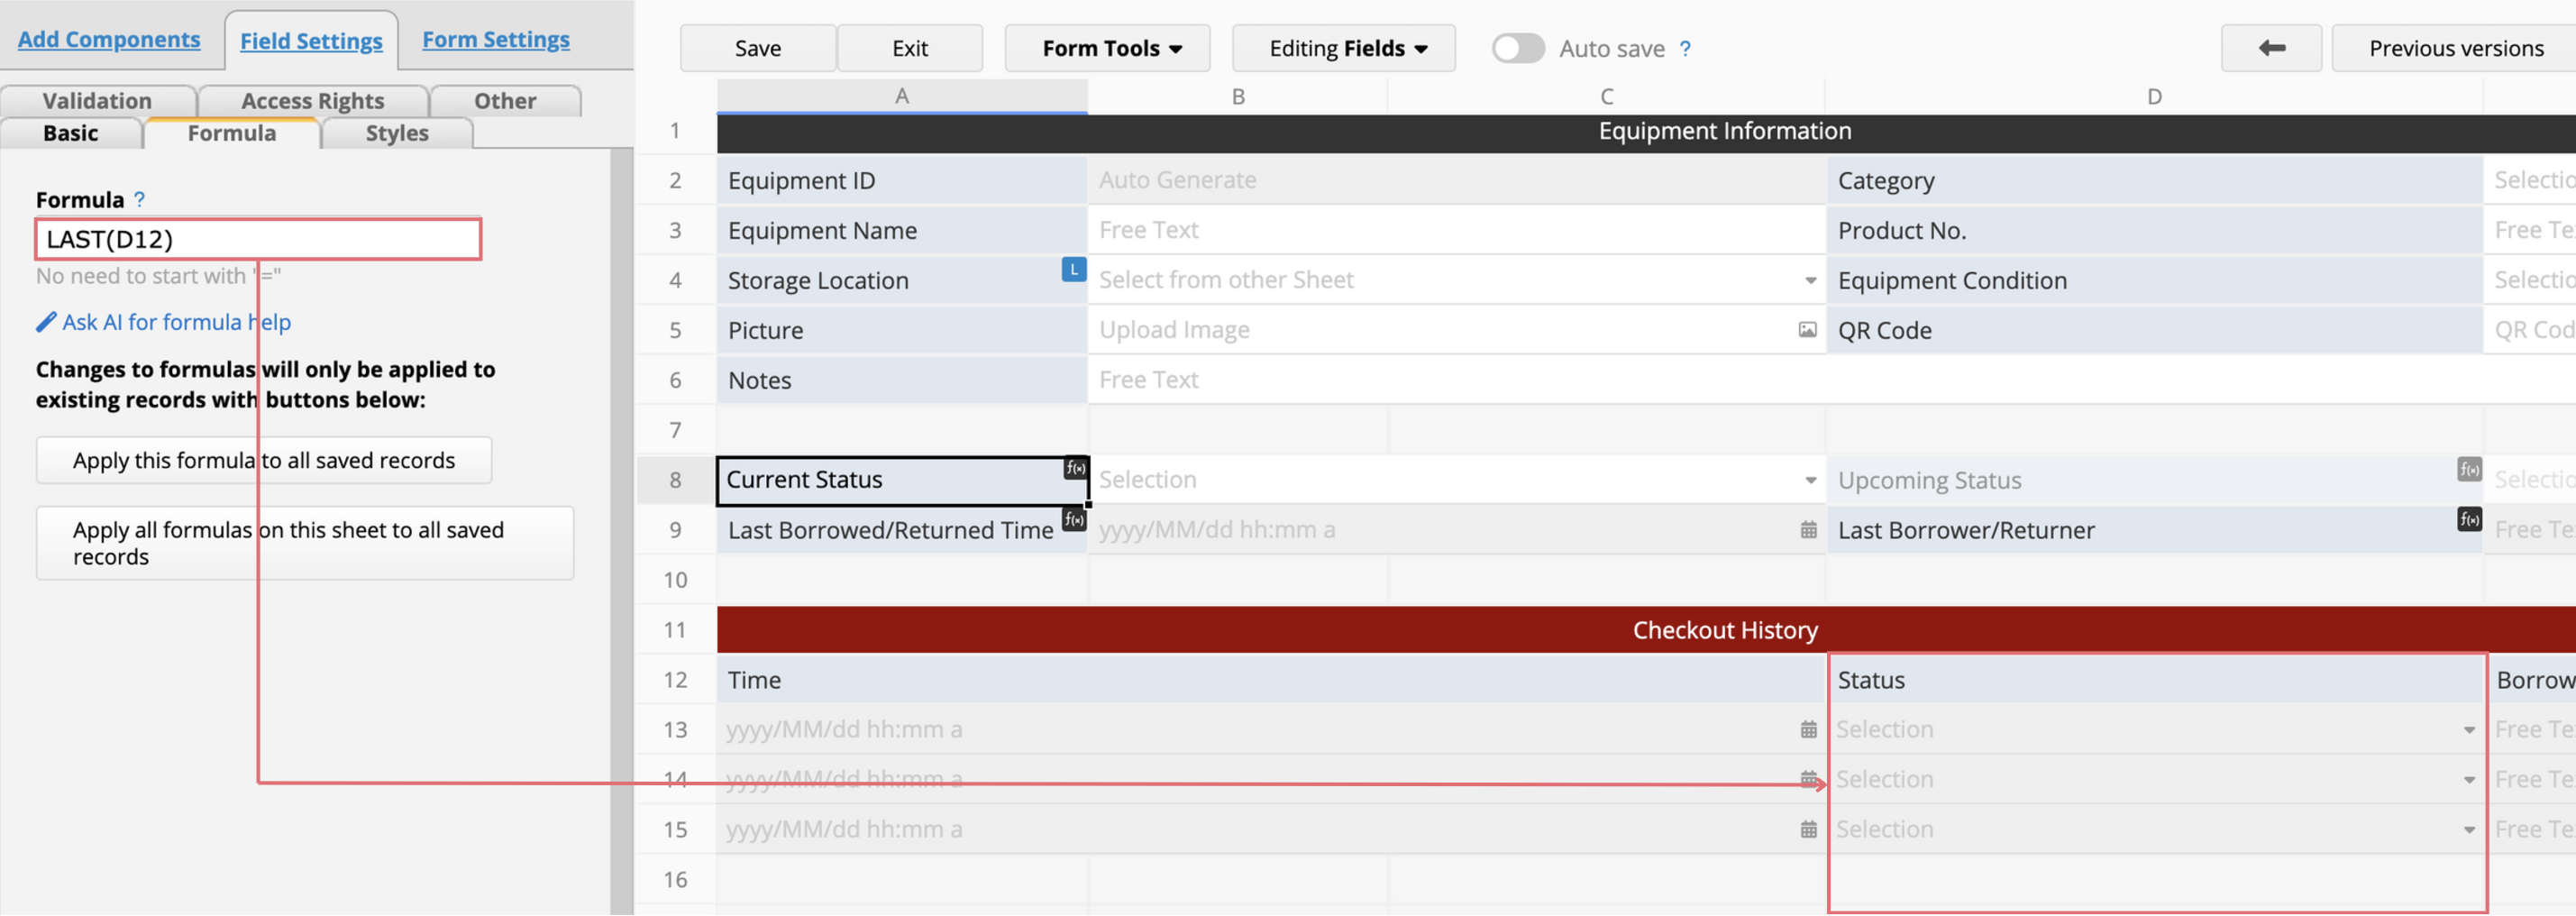
4. To fetch the latest checkout details, in the "Current Status" field (A8), set the formula to LAST(D12) to fetch the latest borrowing/return status from the Subtable. Additionally, set the formula for "Last Borrowed/Returned Time" (A9) to LAST(A12), and for "Last Borrower/Returner" (D9), set the formula to LAST(E12) to fetch the latest borrowing time and borrower information from the Subtable.
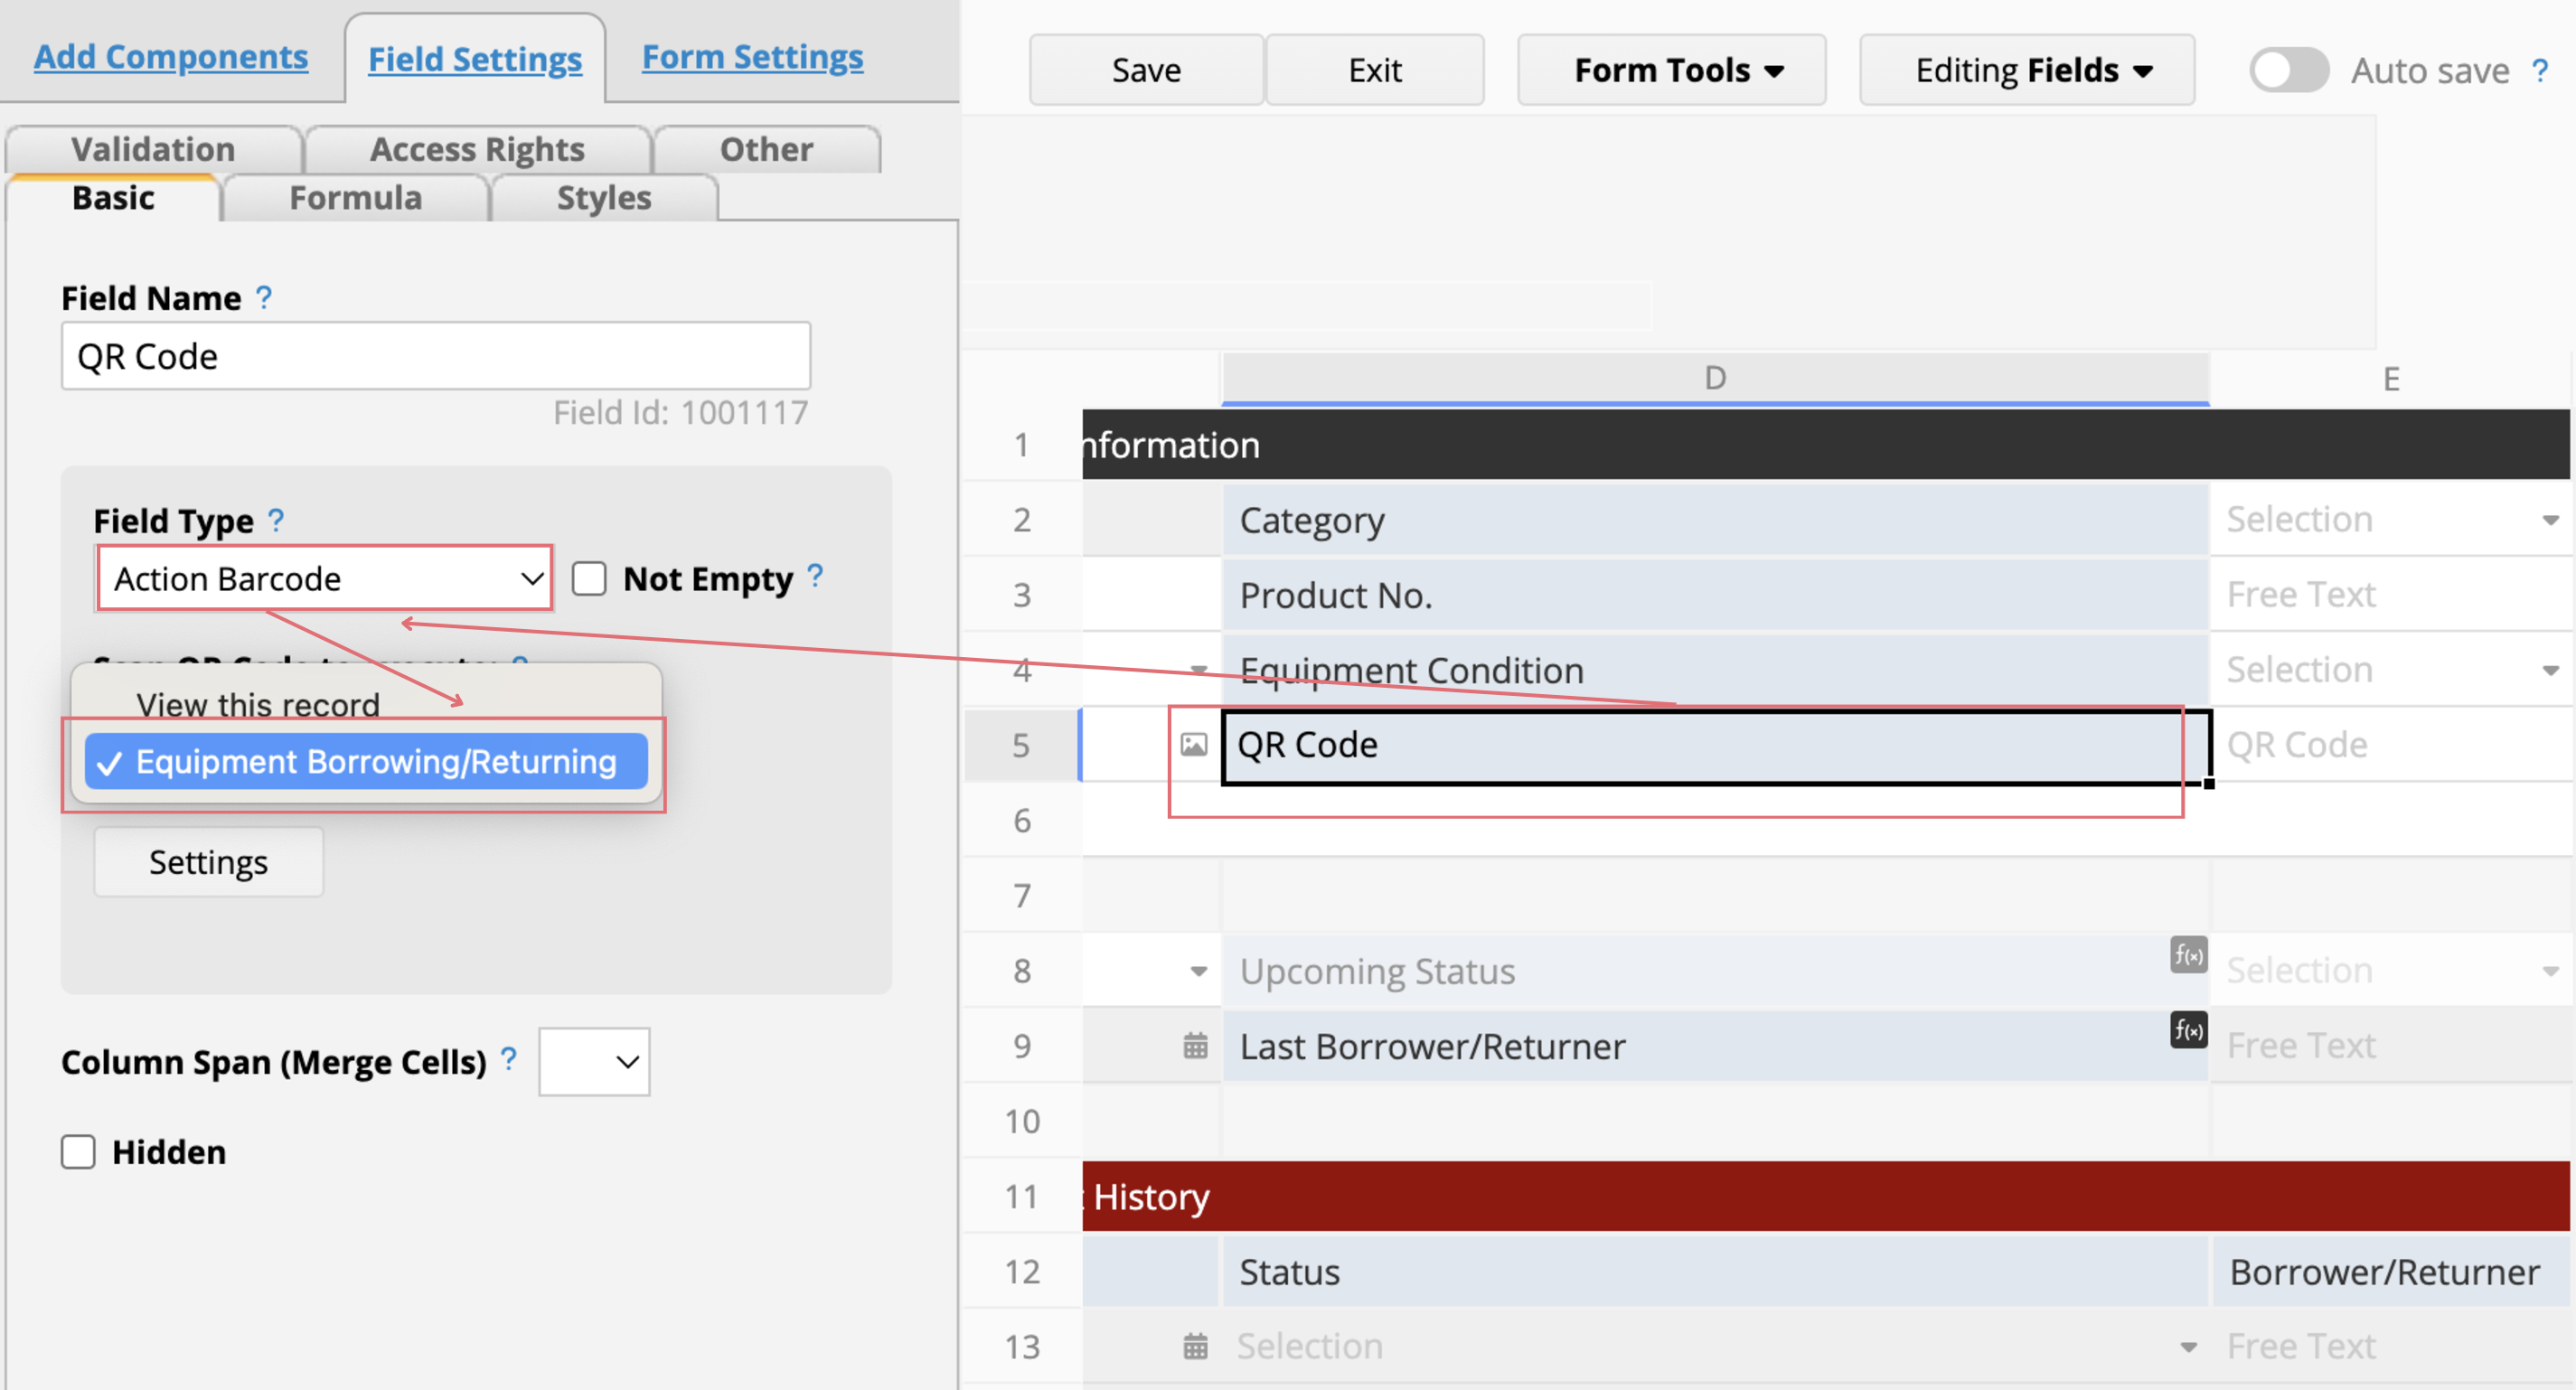
5. Set the QR Code Field Type to Action Barcode, and configure it to trigger the "Equipment Borrowing/Returning" Action Button (created in Step 3) when scanned. Once done, save the changes.
6. Once set up, a QR code will be automatically generated for each new entry.
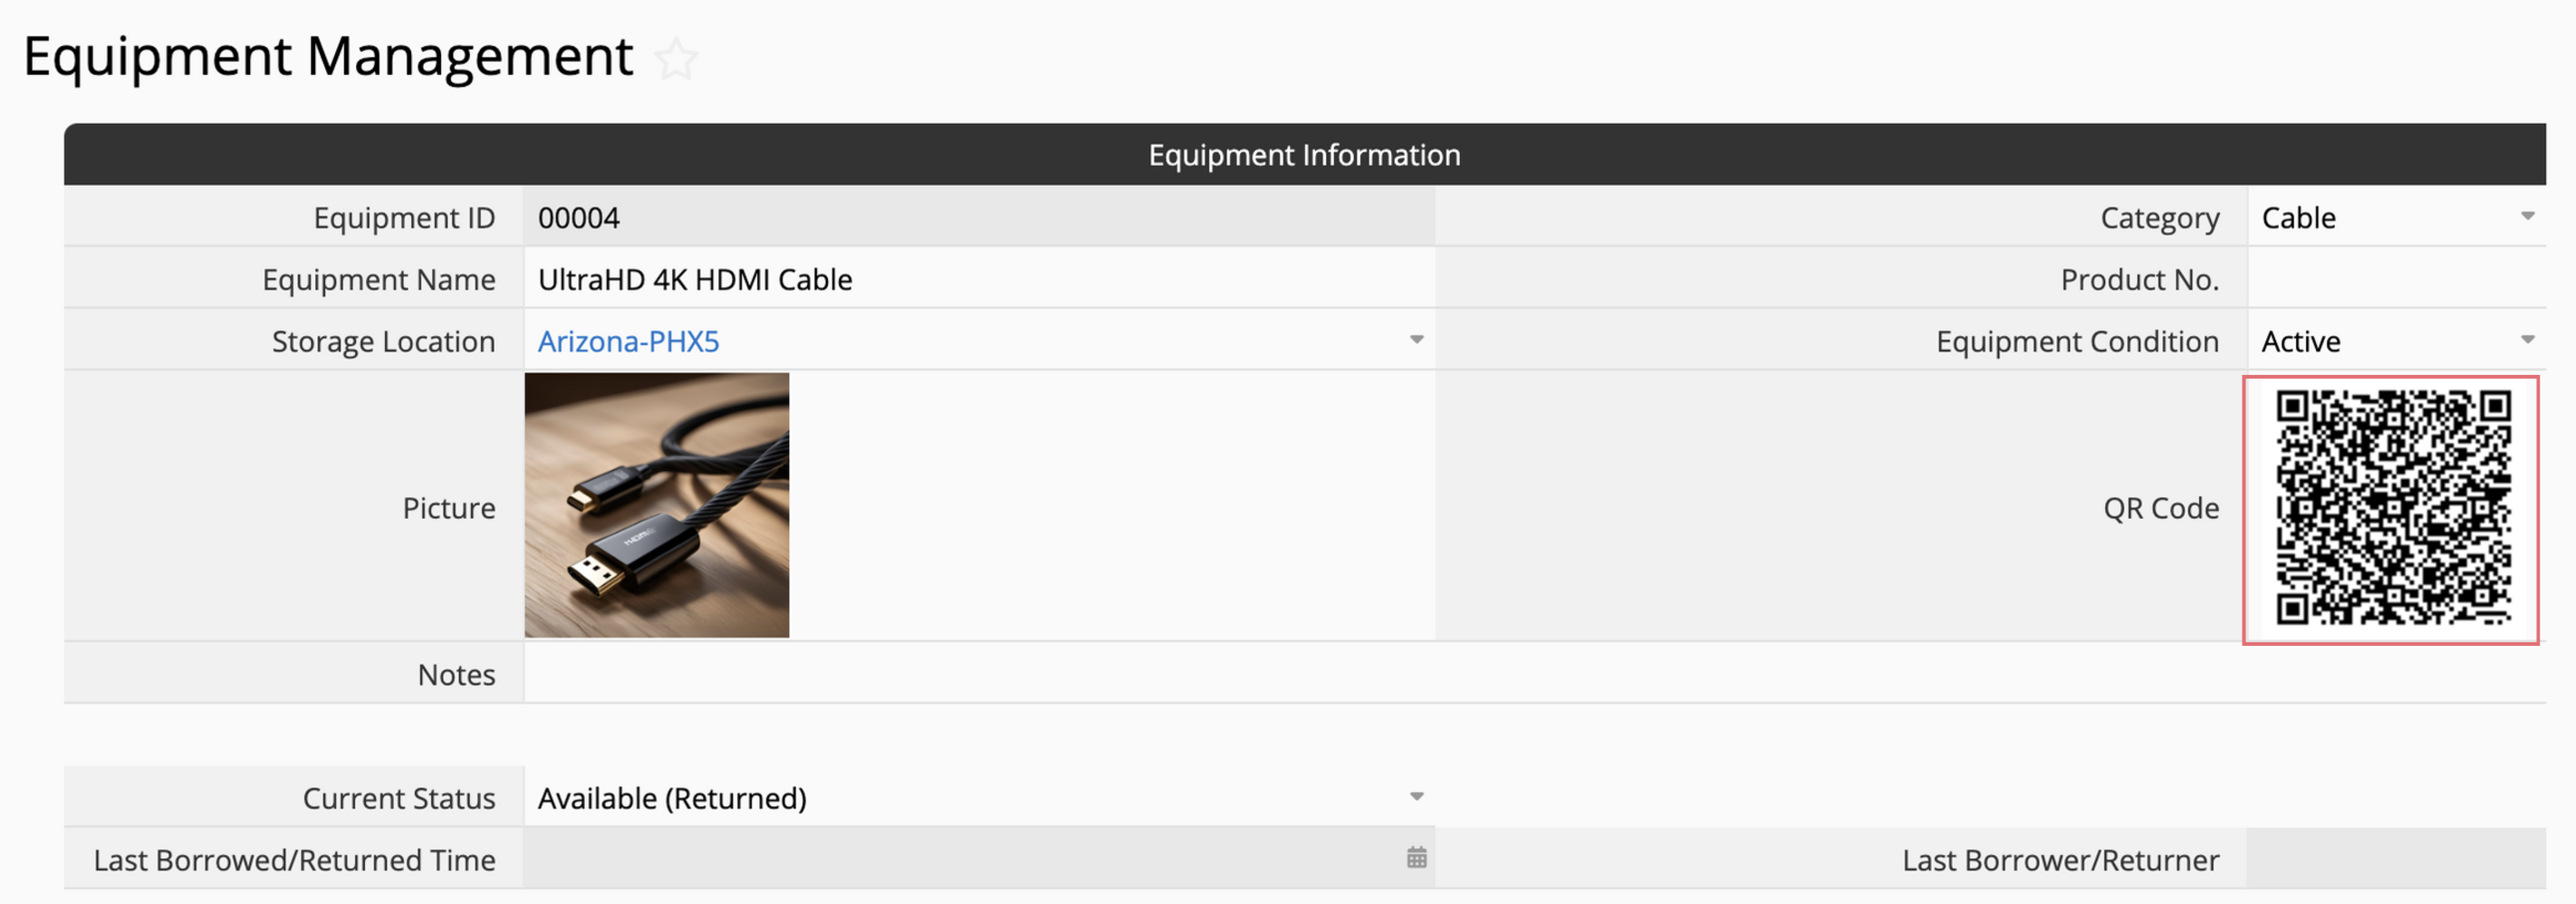
7. After entering all the data, use the Label Maker like in this tutorial (Step 3) to print labels and attach them to the equipment.

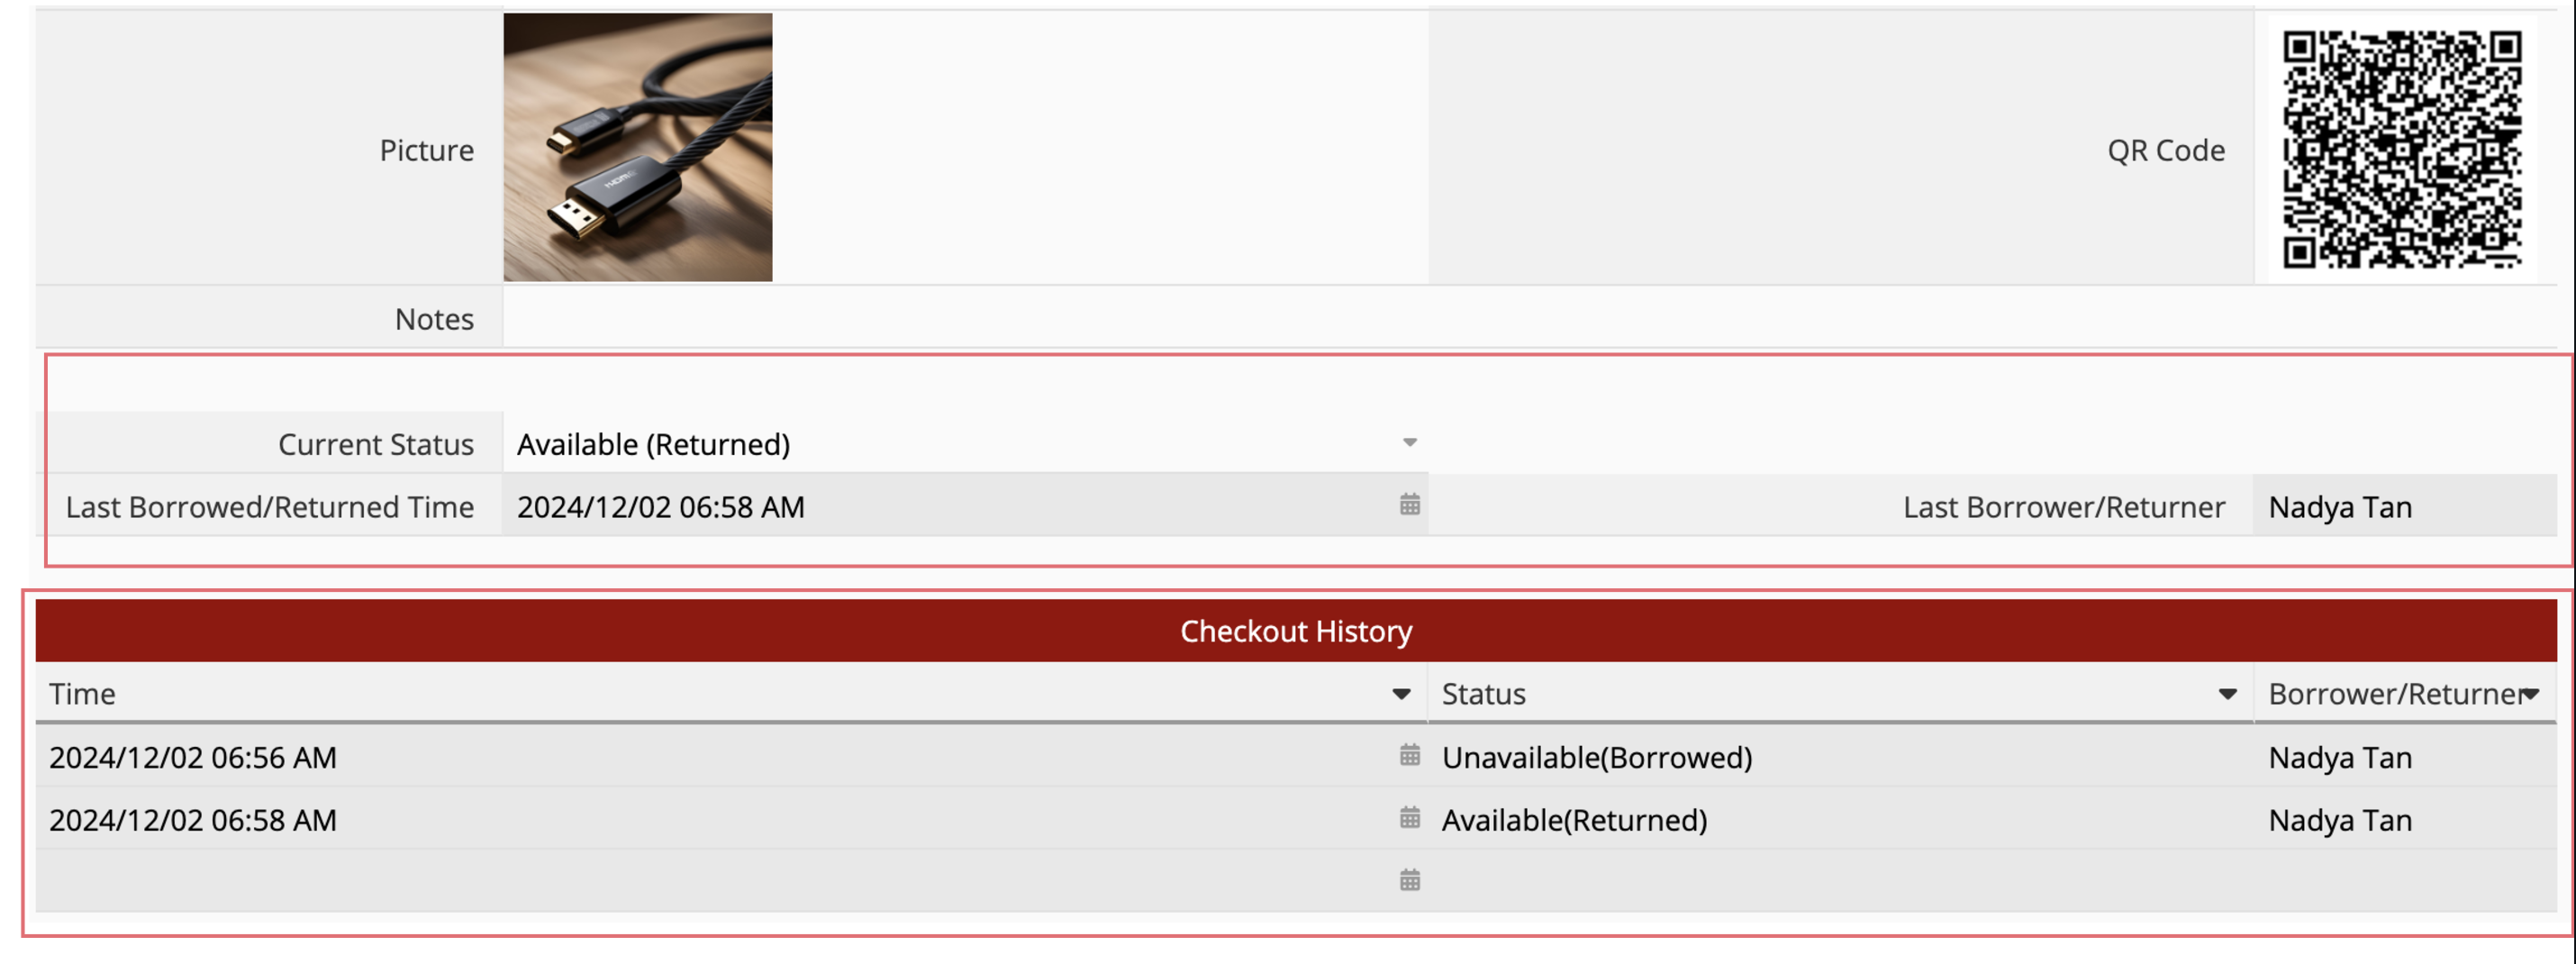
8. When equipment is borrowed or returned, simply scan the QR code on the equipment. The sheet will automatically record the time, status, and borrower, and display the current borrowing status.
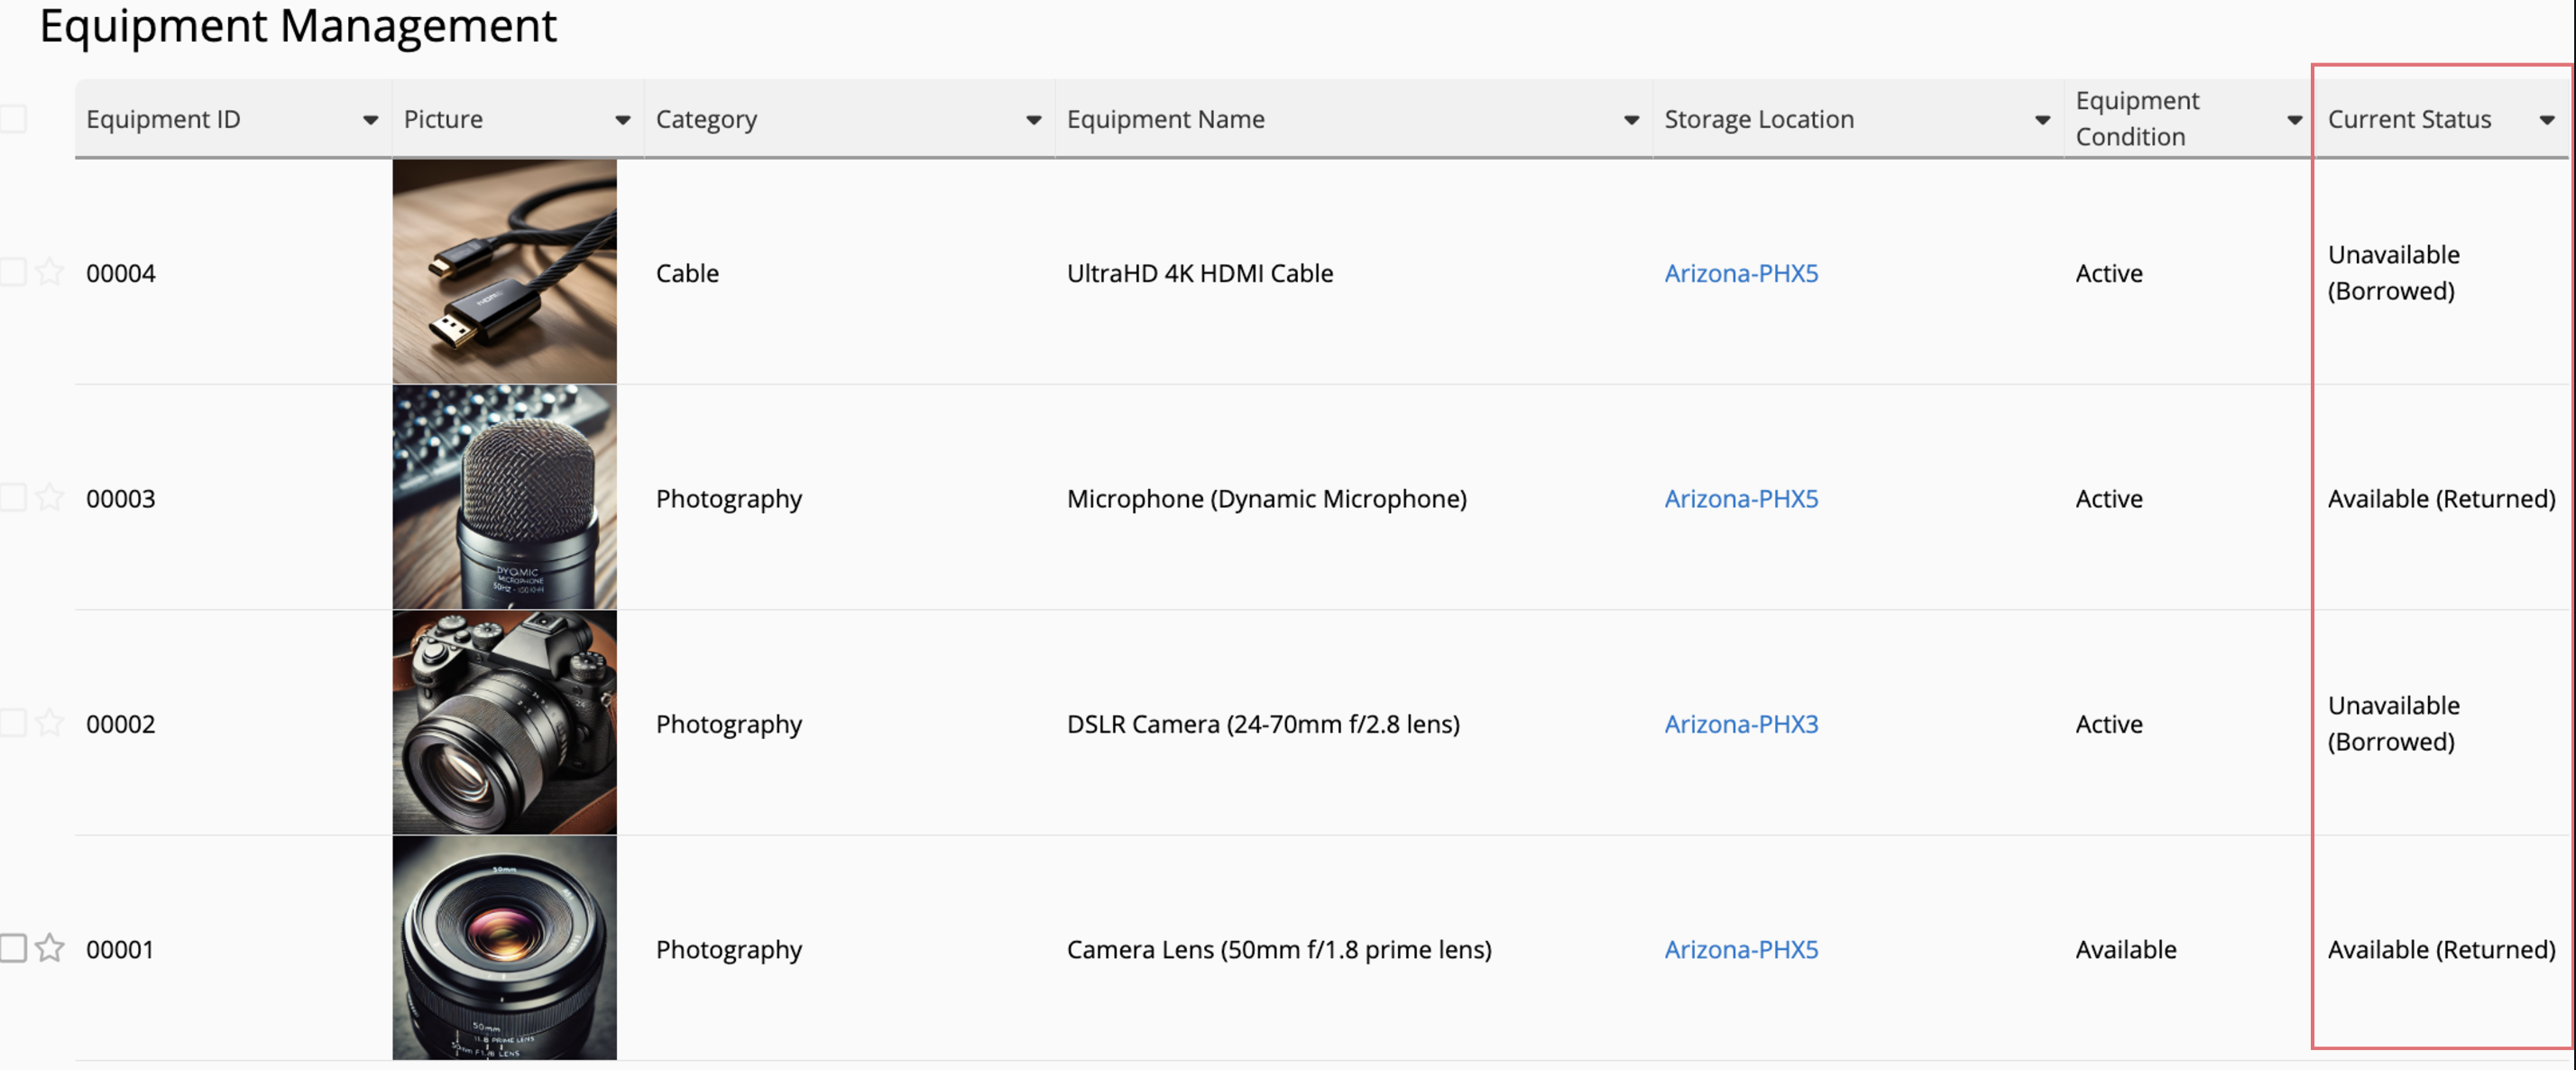
You can also view the current borrowing status of all equipment on the Listing Page.
 Thank you for your valuable feedback!